How to Crochet a Mini Birthday Hat [+ Video Tutorial]
In How to Crochet a Mini Birthday Hat you will find a video tutorial as well as get the FREE pattern! Celebrate any special occasion with a fun handmade hat and learn how to customize it so make it perfect for your next celebration!
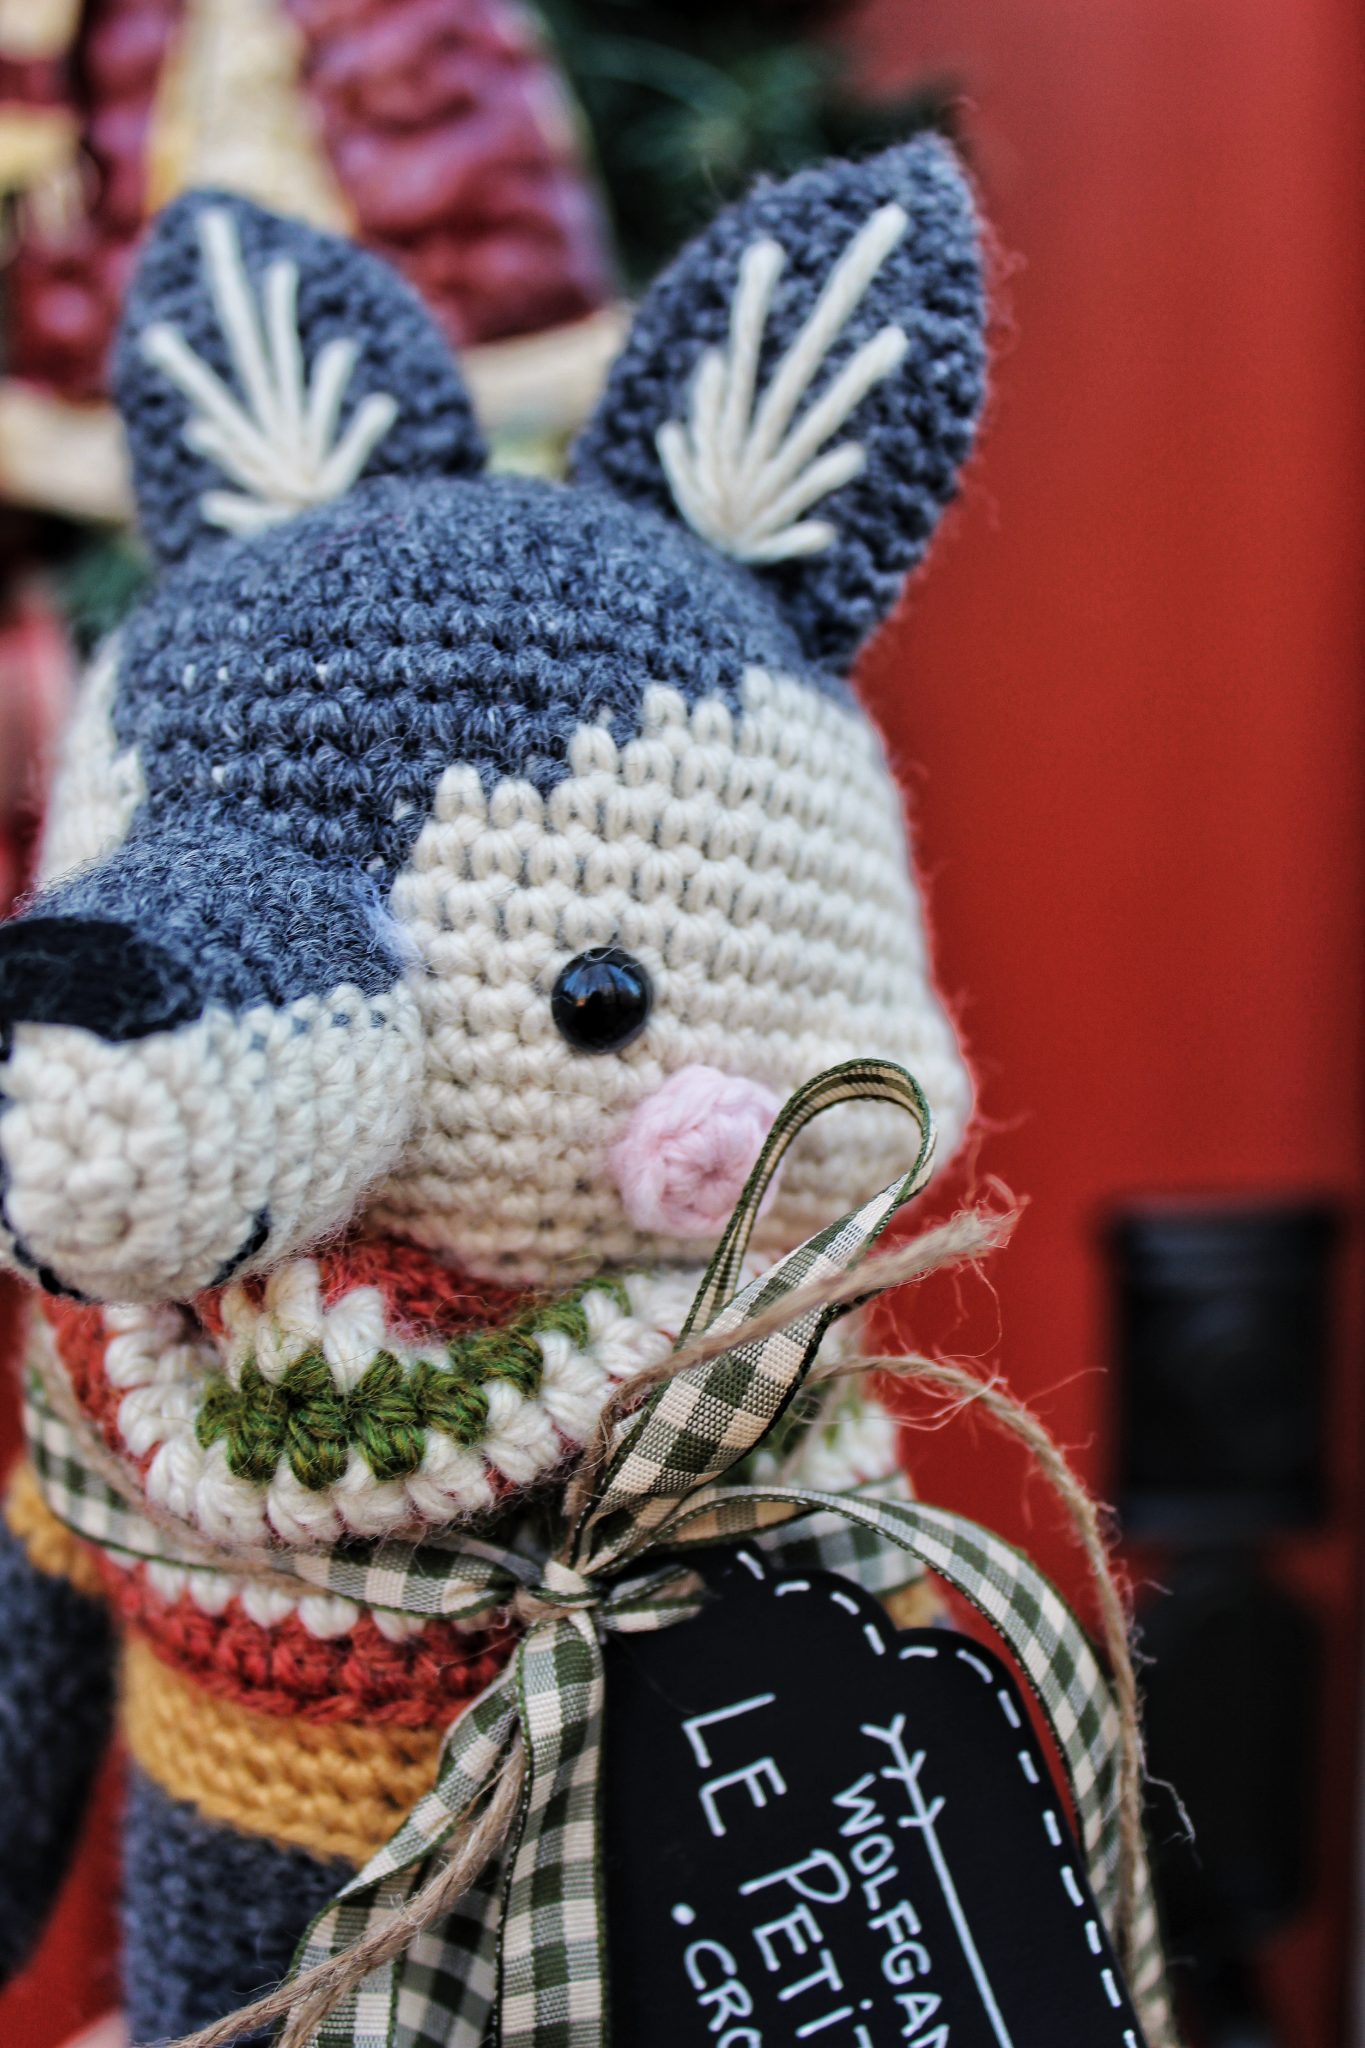
Our rescue dog, Jersey-Boy had a birthday coming up and I knew I wanted to crochet something special for him. It didn’t take me long to think of a hat and I got to work right away.
Although it’s the perfect size for a cute little dog, it would be just as adorable for a human too.
This mini birthday hat whips up so quickly and you can customize it any way you like. You can make it bigger or smaller (which I will show you how to do). Change the colors to match your theme. Or even use materials other than yarn to embellish the birthday hat (and I’m going to show you how to do that too).
You will find the full pattern below or you can have it sent straight to your inbox.
How to Crochet a Mini Birthday Hat Video Tutorial
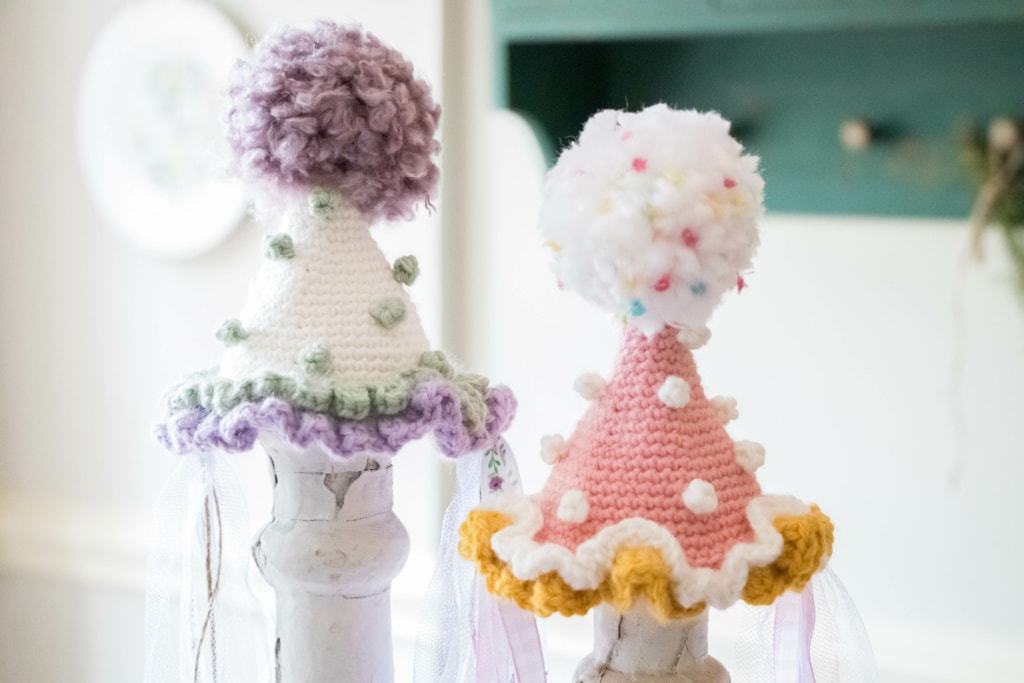
This mini birthday hat is very simple to crochet and is easily customizable. Choose the perfect colors to compliment your next party or holiday. You can even embellish your hat with bobbles, crocheted flowers, ribbons and more.
How to Crochet a Mini Hat
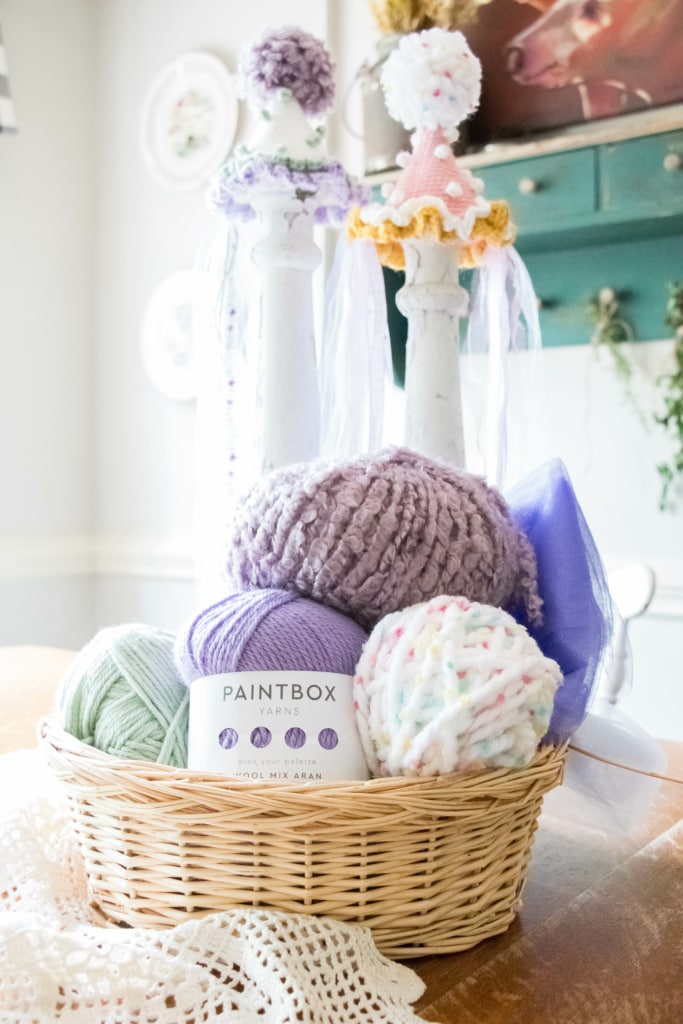
The Yarn
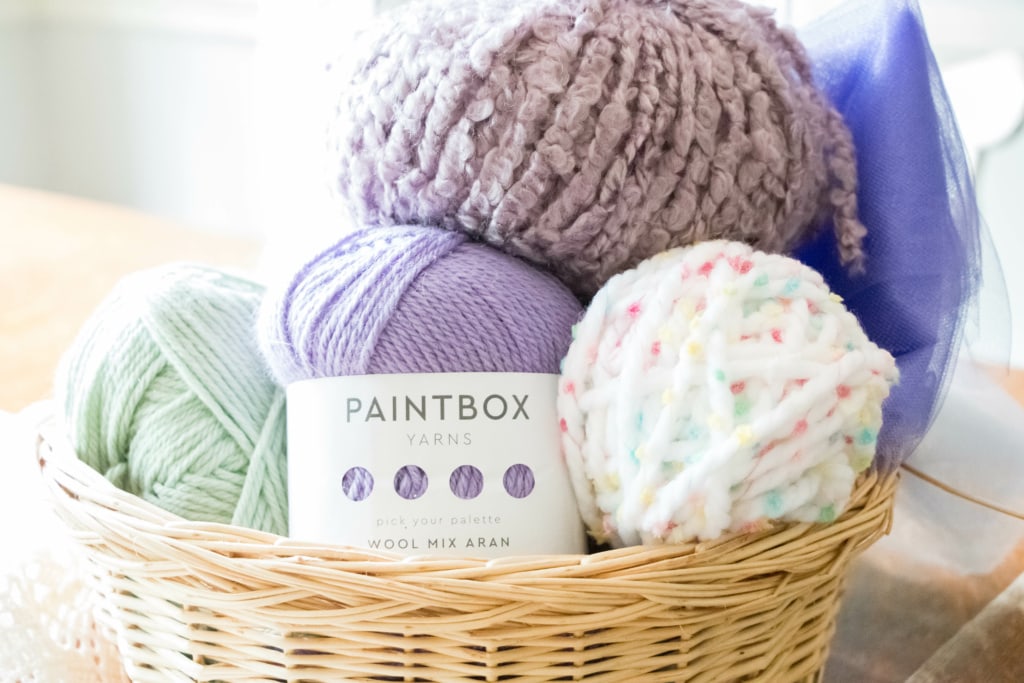
When crocheting this mini birthday hat I used one of my all time favorite yarns, Paintbox Wool Mix Aran. It comes in forty-nine gorgeous shades and is a wool/acrylic blend.
This post contains affiliate links and at no cost to you I may earn a teeny tiny commission if you choose to purchase them. Please know that I only recommend products I use and love! Thank you for supporting Le Petit Saint Crochet! You can read my full (and slightly boring) full disclosure here.
Materials
- Worsted/Aran weight yarn (I used Paintbox Wool Mix Aran)
- 3.5 mm crochet hook
- Stitch Marker
- 45mm Pom Pom Maker
- Embroidery Scissors
- Yarn Needle
- Yarn for Pom Pom (I used a fun, textured bulky weight yarn from my stash)
- For the ties: Ribbon, Twine, Tulle
Abbreviations
- st = stitch
- sc = single crochet
- inc = increase
- sl st = slip stitch
- dc = double crochet
- hdc = half double crochet
- BLO = back loop only
- FLO = front loop only
Crochet Mini Birthday Hat Pattern
Starting with the main color of your hat
6sc in a magic ring (If you need help with the magic ring, check out this tutorial: How to Make a Magic Ring)
Round 1: [1 sc, inc) 3 times (9)
Round 2: sc each st
Round 3: [2 sc, inc] 3 times (12)
Round 4: sc each st
Round 5: [2 sc, inc] 4 times (16)
Round 6: sc each st
Round 7: [3 sc, inc] 4 times (20)
Round 8: sc each st
Round 9: [4 sc, inc] 4 times (24)
Round 10: sc each st
Round 11: [3 sc, inc] 6 times (30)
Round 12: sc each st
Round 13: [4 sc, inc] 6 times (36)
Round 14: sc each st
Round 15: sc each st
Round 16: [5 sc, inc] 6 times (42)
Round 17: sc each st
Round 18: sc each st
Round 19: [6 sc, inc] 6 times (48)
Round 20: sc each st
Round 21: sc each st
Round 22: [7 sc, inc] 6 times (54)
Round 23: sc each st
Round 24: sc BLO each st
To Finish: sl st to the first st, fasten off, weave in ends
If you want to make your hat taller, continue adding increase rounds + two “sc in each st” rounds. Make sure not to increase by more than six in each round.
If you would like your hat smaller, stop at the point where you like the diameter and then finish with the BLO round and work from that point forward.
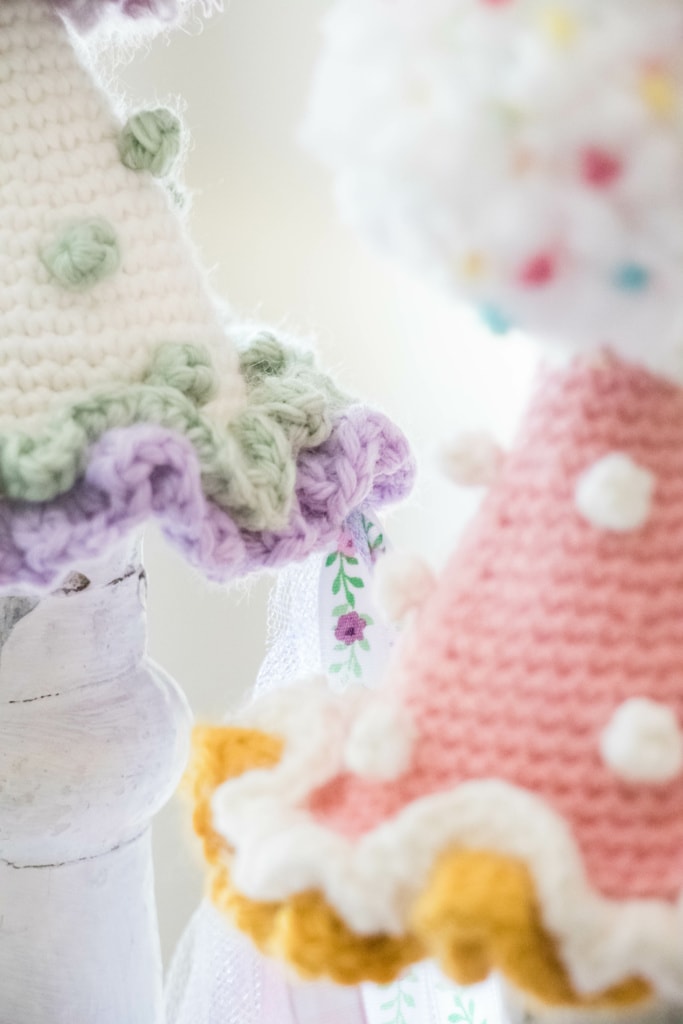
Ruffles
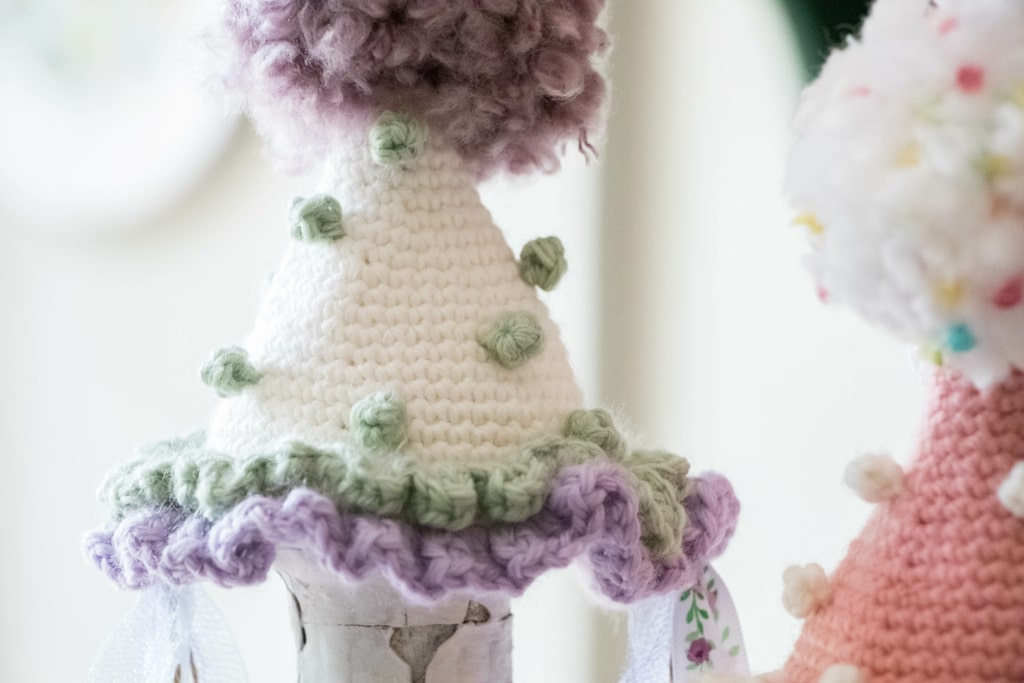
Change colors to your bottom ruffle color
•Join with a sl st to the BLO of round 24, ch 3, 2 dc in same st. 3 dc in each st of the round. Sl st to the top of the ch 3, fasten off, weave in ends
Change colors to your top ruffle color
•Join with a sl st to the FLO, ch 2, 2 hdc in same st, 3 hdc in each st of the round. Sl st to the top of the ch 2, fasten off, weave in ends
Baubles
With the contrasting color(s) make 15 baubles
•leaving a long tail, 4 sc in a magic loop. Sl st to the first sc, fasten off, weave in ends.
Leave the bauble inside out, pull tight to close and leave a long tail to fasten to the hat
Fold the hat in half (front/back). Working with the front, pin each bauble in the spot you like. When happy with the spacing, sew each of the two tails to the inside of the hat. Double knot the bauble in place and trim the excess yarn, leaving enough tail to tighten if necessary.
Assembling the Mini Birthday Hat
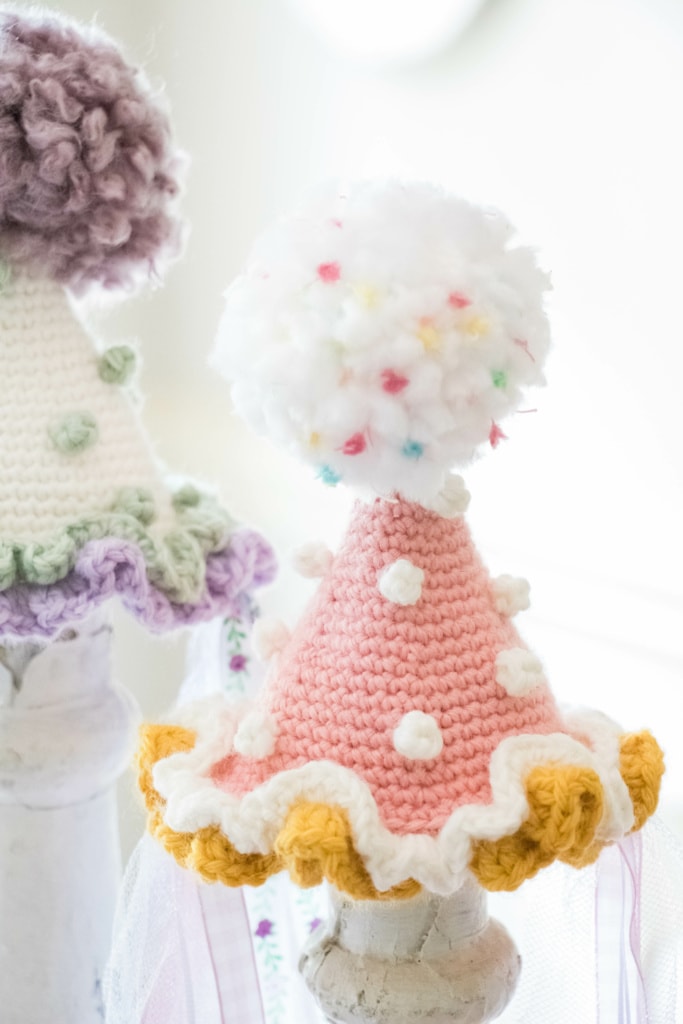
Pom-Pom
For the pom pom, be as creative as you would like to be. For the pink, yellow and white hat, I used a completely different weight yarn. It incorporated the same colors, but was much fuzzier and had a confetti texture to it.
You can also use three different yarn colors to make a super fun pom pom for the hat.
Make a pom pom with your pom pom maker and leave long ends for securing.
With a yarn needle, sew one tail end through the center of your magic ring at the top of the birthday hat. Sew the other tail end one stitch away.
Tie the ends securely inside the hat and trim the excess.

Ties
For the ties I attached them at each side of the hat. I used a combination of tulle and different sized coordinating ribbon to make the ties look fun and unique.
Measure the length you would like the ties to be and double the measurement. Working with one side at a time, fold the ties in half and using your crochet hook pull a loop through a loop of a stitch on the inside edge of the hat (not the ruffle section).
With a generous sized loop, make sure that the ends of your ties are even (it doesn’t have to be perfect, we will trim them up after). Pull the ends through the loop to secure. Pull taut. Trim the ends if you want them to be even, or leave them uneven for a whimsical look.
How to Crochet a Mini Birthday Hat
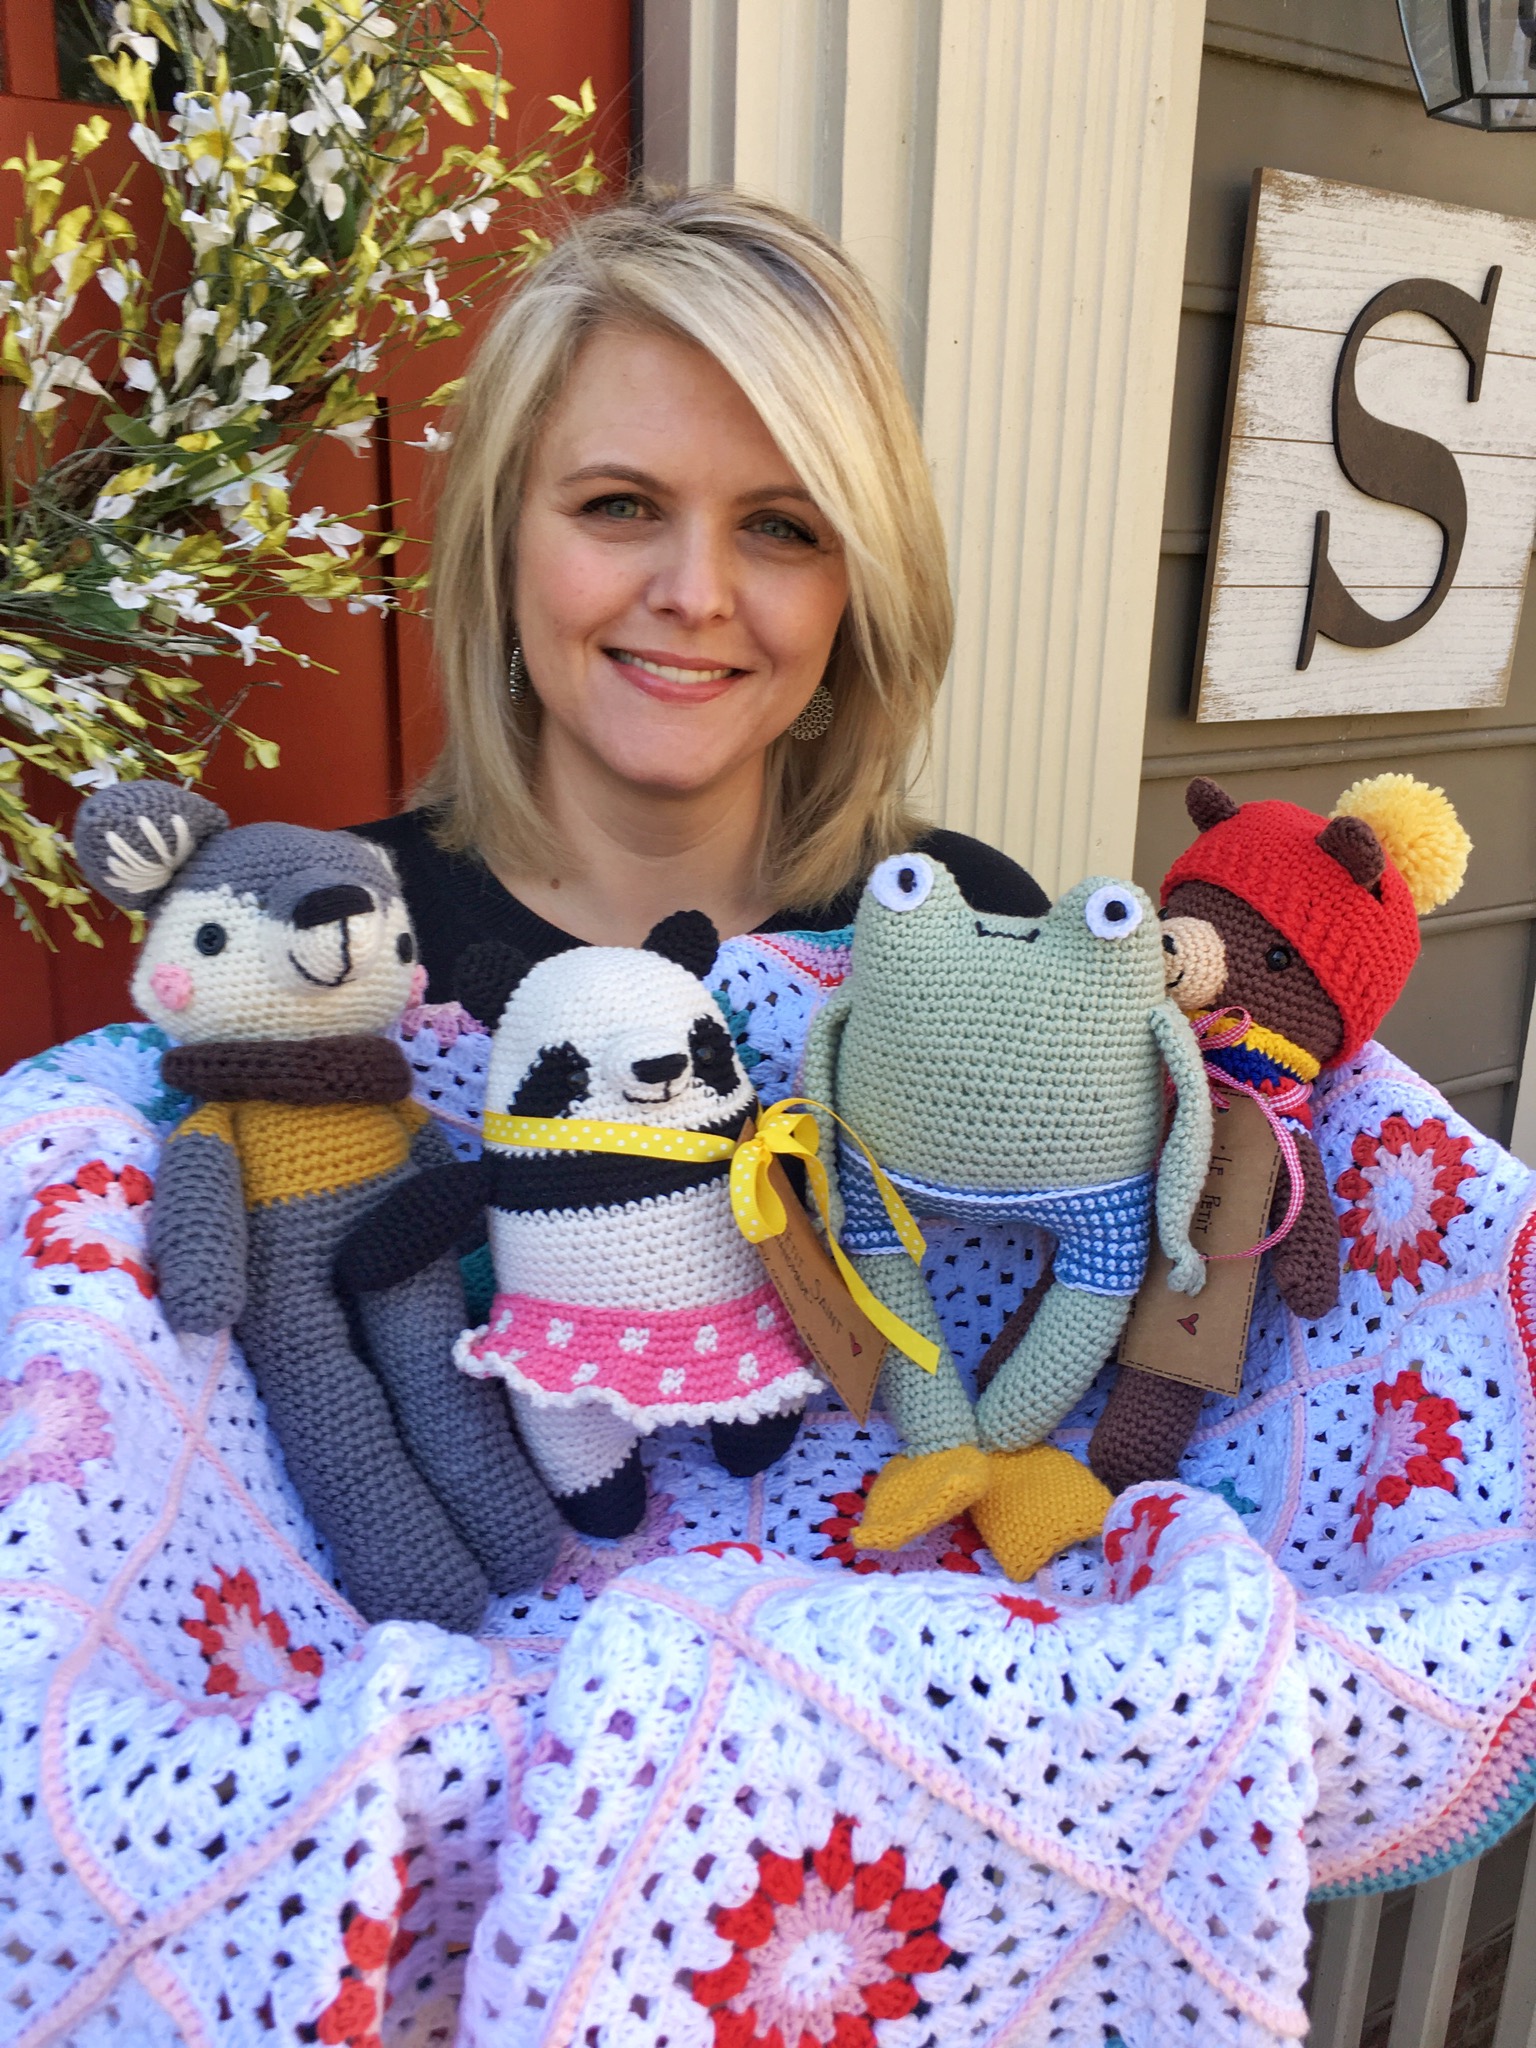
I hope you enjoyed this super fun and simple pattern. If you end up making one (or ten) tag me on Instagram @lepetitsaintcrochet. I would love to see them and share your makes with others!
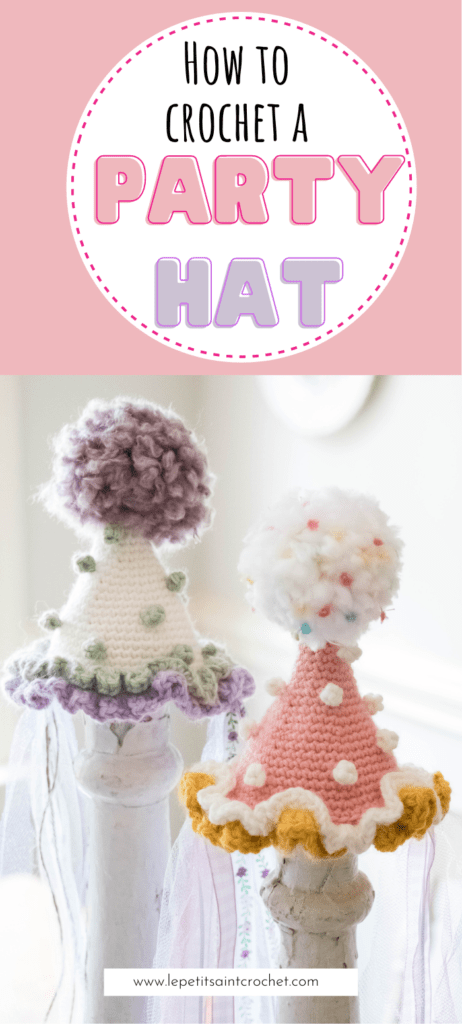
Pin the Crochet Mini Birthday Hat for Later!

Oh, my…the photo of your pup is too h*cking cute! I prefer to don my birthday tiara each year, but this would definitely be my ‘Plan B’.
Haha! Thank you!!!! I think he looked adorable wearing it as well!! Oooh! A crocheted tiara could be fun to make!
Get on it girlfriend!! (said with a finger snap and hair flip!)
Haha!!! Yes, ma’am!!! 😂😂😂
do you know the name of the yarn you used for the pom pom on the pink hat? thanks!
Hello! So sorry it took me so long to respond! I don’t and I can’t find the label. It was from Hobby Lobby a couple of years ago. Hope that helps!
I LOVE YOU! You are amazing. And THANK YOU for all your wonderful videos. Jersey Boy (I’m a Jersey girl) is so ADORABLE! I laughed so hard when I saw his picture. Thank you for that. But on a serious note, you have brought me to a new level in crocheting. I am self taught. I don’t know if I’m doing something right or not. I just crochet and follow the patterns to a tee. But now……after seeing your videos and your family of critters, there is sooooo much more than following a pattern. Who knew I could be creative in my crocheting? Why didn’t I think to branch out and add a bow or a sweater, etc. I am working on the birthday hat for my mother (she has a great sense of humor) who will be turning 96 in a couple of days. Hopefully that pom pom maker will get here in time. I will take a picture and send it to you. THANK YOU! THANK YOU!
I’m so very glad you are enjoying the videos! Wasn’t Jersey-Boy so cute in his birthday hat??? He’s such a good sport! Sounds like you are a great crocheter, most of us are self taught! But it starts getting really good when you can begin adding your own creative touches! I hope your mom enjoys her handmade birthday hat!! Tell her Happy (belated) Birthday from me!!