
Stranded Knitting for Beginners
Stranded knitting for beginners is a true guide for the novice. If you can cast on, knit and purl, then you can create gorgeous colorwork knits. I will share a little rhyme I created and teach you how to read colorwork charts. You’ll be knitting fair isle sweaters in no time!
If you have never tried stranded knitting before, you are in for a treat, dear friend. This technique looks incredibly complicated, but I assure you it is not. It takes time to become comfortable with colorwork, but once you are the possibilities are endless. And stay tuned for next week when I share how you can design your own colorwork patterns for free!

According to the Vogue® Knitting The Ultimate Knitting Book (which by the way, is an invaluable resource for every knitter):
In stranded knitting, more than one color is worked in a single row. The unused colors are carried along the back of the work, forming floats.
You may be more familiar with the different styles of colorwork like Fair Isle and Icelandic knits. There are so many others and the more you learn the more you will want to know. But let’s first dive into how to do stranded knitting.
Beginner Stranded Knitting Terms
- floats – are the unused color that is held in the back of the work
- colorwork charts – looks like cross stitch patterns with tiny rectangles to indicate which color is used
- right side – the right side of the work, the part you see in the front
- wrong side – the back side of the work (where all the floats are hiding)
- tension – keeping the work neither too loose nor too tight
- blocking – spraying water or using steam on a pinned project to create the desired shape and finish

I will be demonstrating stranded knitting on a flat knit dress. If you are looking for stranded knitting in the round check out this video from Knit Purl Hunter.

How to do Stranded Knitting
The entire tutorial for how to do stranded knitting is in my video. It will make a lot more sense and I carefully and slowly show the technique I use. I am an English knitter so I hold my working yarn in my right hand. If you are looking for a continental knitting tutorial check out this video from Voolenvine.
Also, I am terrible at writing out step by step instructions. If you would like those I highly recommend getting the book Vogue® Knitting The Ultimate Knitting Book: Completely Revised & Updated. I have yet to find such a comprehensive resource for knitting and I think you will find, for the price, it is invaluable for the novice or experienced knitter.

Choosing colors for your stranded knitting project is extremely important and I went into great detail about it here. Make sure that your color choices have good contrast otherwise you may be disappointed with the results.
How to Read a Colorwork Chart

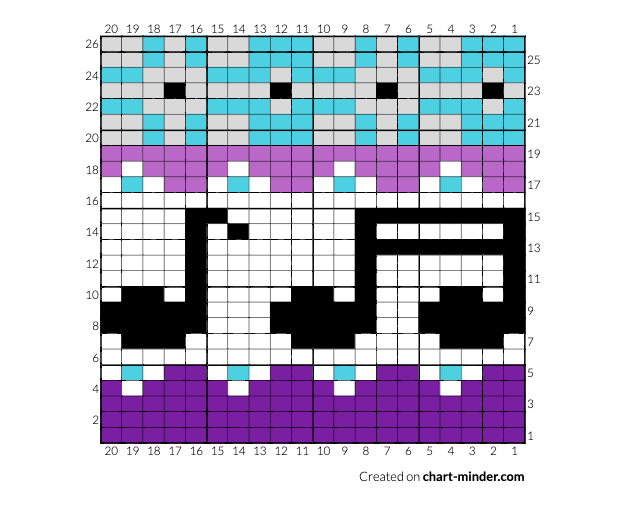
Reading colorwork charts is quite simple, more simple than reading a knitting pattern. Knitting charts are made up of tiny rectangles, not squares, because knit stitches are not the same width as they are tall. The numbers on the right and left sides indicate how many rows are in the chart and the bottom numbers show how many stitches are in the repeat.
For my dress I cast on 100 stitches so there are five repeats. Unless otherwise stated the odd rows (numbers on the left side of the chart) are the right side of the work. The even rows are the wrong side of the work. Since this chart is for a stockinette stitch the odd rows are knit and the even rows are purls.

Beginning on row 1 read the chart from right to left. Once you come to the end of your repeats you start row 2 at the left and read it to the right. Each rectangle represents one stitch.
For example if I was reading row 5 I would read it as knit two purple, knit one white, knit one blue, knit one white, knit two purple and so on.
Pattern
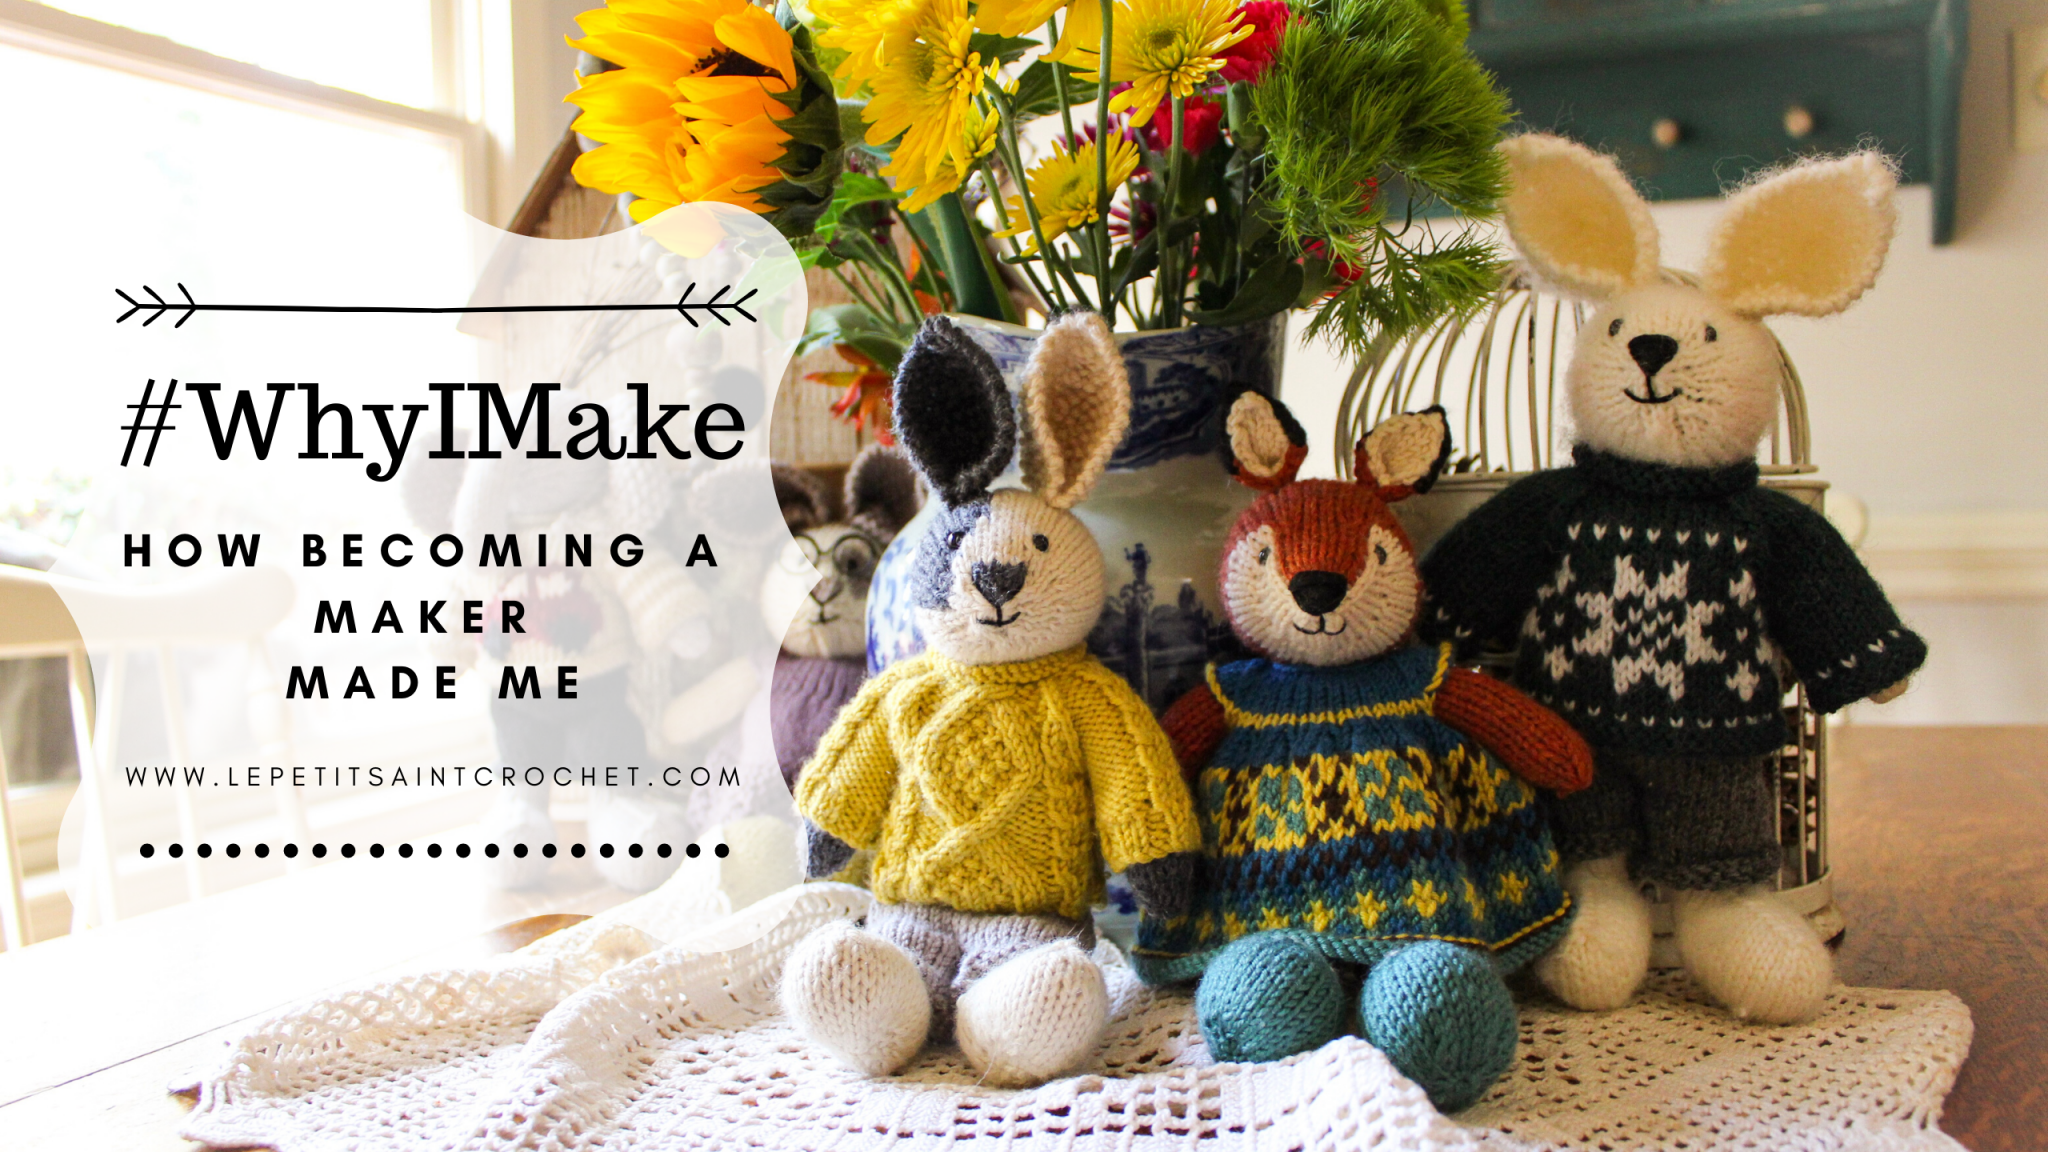
This beautiful bunny pattern is from the talented Julie Williams from Little Cotton Rabbits. To make this project for yourself you will need this bunny pattern and this dress pattern. I have also used a modification of the dress pattern from Suzy Marie Knits. For this project I cast on 100 stitches and followed that section, which is a little more than halfway down the page.
Stranded Knitting Rhyme
I created this silly little rhyme to help me remember which direction the yarn should be going. The rhyme works best if you’re only using two colors which is what I’ve demonstrated in the above video. This also works whether you’re on the knit or purl side of your work. Obviously you will want to sing this in your best hillbilly accent, but just do your best.
Drop the old color, pick up the new – bring it on top, that’s how we do


Drop the new color, pick up the old – bring it on bottom, it ain’t no problem


Catching Floats

When you are changing colors ever 1, 2, 3, or 4 stitches there is no need to catch your floats. They will be short enough in length. The problem with long floats is that a person’s fingers could get caught when putting on the garment.
Even though it’s only a little bunny wearing the dress I still catch my floats when needed. Any section with five or stitches of one color I will catch the float. It’s quite simple and you only need to twist your yarns in order to catch the unused color.

This post contains affiliates links and at no cost to you I may earn a teeny tiny commission if you choose to purchase them. Please know that I only recommend products I use and love! Thank you for supporting Le Petit Saint Crochet!
In the video I demonstrate how to do this. But for example if I was working a section of five white stitches and carrying the black yarn behind I would catch (twist my yarns) after the third white stitch. The floats will then be a manageable length.
Make sure you change up where you catch your floats. You don’t want to catch them at the same place row after row. It will show on the right side of your work. For example in the above chart, if you catch the float on the fourth stitch of the 11th row, catch your float on the third or fifth stitch on the 12th row.
The Importance of Blocking

Depending on the type of fiber used may change how you choose to block, not if. Whether you wet or steam block your project is up to you, but don’t skip this step. When your project is dry it will look much more finished and show off your gorgeous colorwork.

This is the blocking mat that I personally use and love. The pins are rust proof and it has one inch grids that is a major help when blocking projects that need to be even or symmetrical.
Stranded Knitting
I hope that this tutorial was helpful and that you will give stranded knitting a try. Like with all things, it may feel awkward in the beginning but with a little patience and practice you will be knitting gorgeous colorwork in no time flat!
Pin for Later!


Great post! Thank you.
I’m so glad you liked it!
Great post. The chart looks a little like my weaving chart. You’re so talented!!ðŸ˜
So much talent! Everything you make is beautiful!
Thank you so much, Amy! ðŸ°
All of your creations are so beautiful!
Thanks so much, Rachel! ðŸ°
Wow I don’t think I could figure that out! Beautiful!
Thank you so much! It’s not as hard as it looks!
Everything you make is so cute! You make it look so easy!!
Awww, thanks so much, Laura!
Thank you for the informative post. I always learn so much about knitting from you. Beautiful work as always!
Awww, thanks so much, Stephanie! ðŸ°ðŸ°ðŸ°
Colorwork is on my goals list for knitting! I have a current project to finish but pinned this to come back to! And yes, the Vogue Knitting book is SO good!
You will be there in no time! It’s fairly simple when you’re working with only two colors especially!
You are so funny! You really are a great teacher! Love that little bunny’s dress!
Lol! Thanks so much, Jenn! I had so much fun with this dress!! ðŸ°ðŸ°ðŸ°